Outdoor Kitchen Lighting Guide: The Definitive 2026 Pro Guide
The integration of high-performance illumination into the al fresco culinary environment represents one of the most technically demanding aspects of residential landscape architecture. For many years, the outdoor cooking space was treated as a peripheral area, often lit by the spillover of a single porch light or the utilitarian glare of a floodlight. Outdoor Kitchen Lighting Guide. However, as the “outdoor room” has evolved into a sophisticated, multi-functional hub for gastronomy and social engagement, the requirement for a nuanced, layered lighting strategy has become paramount. Proper illumination in this context is not merely a matter of visibility; it is a critical intersection of safety, ergonomics, and atmospheric control.
Designing a lighting system for an outdoor kitchen involves navigating a set of environmental variables that are absent in interior design. One must account for the lack of reflective surfaces, the corrosive nature of humidity and salt air, and the physiological impact of “glare” in a dark-adapted environment. Furthermore, the mechanical requirements of the kitchen—specifically high-heat zones around grills and moisture-heavy zones near sinks—dictate the use of specialized fixtures that can maintain structural and electrical integrity under duress. To fail at this planning stage is to render a significant financial investment unusable for half of the day.
This comprehensive exploration serves as a definitive reference for those seeking to master the complexities of exterior illumination. We move beyond the superficial advice of “placing a few lanterns” and instead analyze the physics of light distribution, the metallurgical requirements of durable fixtures, and the psychological frameworks that define a comfortable social space. By treating the lighting as a primary building system rather than an afterthought, we ensure that the outdoor kitchen functions as a safe, high-performance workspace and a compelling aesthetic anchor for the property.
Understanding “outdoor kitchen lighting guide”
A professional outdoor kitchen lighting guide must first address the common misunderstanding that interior lighting principles can be directly transplanted to the backyard. In an indoor kitchen, light reflects off white ceilings and neutral walls, creating a “bounce” that fills shadows. Outdoors, the “ceiling” is the night sky—a literal void that absorbs light. This means that every lumen produced by a fixture must be directed with surgical precision, or it becomes “light pollution” that disrupts the neighbor’s view and creates a disorienting glare for the chef.
The oversimplification risk in this sector often centers on “brightness.” Many homeowners believe that more light equals better visibility. In reality, excessively bright lights cause the human pupil to contract, making the areas just outside the light beam appear pitch black. This creates a dangerous “tunnel vision” effect. A sophisticated guide prioritizes “Dynamic Range”—the ability to have intense, focused light on the cutting board (task lighting) while maintaining soft, low-intensity light on the dining surfaces (ambient lighting).
Moreover, a multi-perspective analysis requires looking at the “Ingress Protection” (IP) ratings of the fixtures. An outdoor kitchen is a high-stress environment; it is subjected to pressurized water from garden hoses, grease-laden vapors from the grill, and thermal expansion from seasonal temperature swings. Understanding this guide means recognizing that a fixture’s beauty is secondary to its ability to prevent moisture from reaching the LED driver—a failure that leads to flickering, dimming, and eventual system-wide electrical shorts.
Contextual Evolution: From Campfires to Kelvin Scales
The history of outdoor kitchen lighting mirrors the broader evolution of the domestic landscape. In the mid-20th century, the “barbecue pit” was illuminated by simple incandescent bulbs housed in glass jars. These provided a flat, yellow light with a low Color Rendering Index (CRI), making it difficult for the cook to distinguish between a medium-rare steak and one that was burnt. The goal was purely functional: avoid cutting a finger and ensure the coals were lit.
The 1980s and 90s introduced the halogen era. Halogen bulbs offered a crisper, whiter light and better beam control, but they were notoriously inefficient and produced immense amounts of heat—a liability when placed near already hot grills. This period also saw the rise of the “security floodlight” mentality, where the entire backyard was washed in high-intensity light, destroying the ambiance of the space in favor of visibility.
Today, we are firmly in the “Integrated LED Era.” Modern systems utilize solid-state lighting that allows for microscopic beam control and adjustable Color Temperatures (measured in Kelvin). We can now “tune” the light to match the warm glow of a wood-fire oven (2700K) or the clean, clinical white needed for precision butchery (4000K). The evolution has moved from “Illumination” to “Atmospheric Management,” where the lighting system is integrated into the home’s automation network, responding to the time of day, the occupancy of the space, and even the music being played.
Conceptual Frameworks and Mental Models for Illumination
1. The “Layered Light” Hierarchy
This framework posits that a successful plan must contain three distinct layers: Task, Ambient, and Accent.
-
Task: High-intensity, focused light on work surfaces.
-
Ambient: Low-intensity, diffused light that allows people to navigate safely without being blinded.
-
Accent: Decorative light that highlights architectural features like stone textures or a nearby water feature. The mental model here is Operational Redundancy: if the task lights are too bright, they shouldn’t wash out the ambient glow.
2. The “Dark Sky” Mental Model
This framework focuses on “Directionality.” It dictates that no light should be emitted above the horizontal plane. By directing light downward (downlighting), we preserve the visibility of the stars and prevent glare. This model serves as a constraint: every fixture choice is evaluated by its “Cutoff” angle—how effectively it hides the bulb (source) from the eye.
3. The “CRI-Visual Integrity” Framework
The Color Rendering Index (CRI) measures how accurately a light source reveals the true colors of an object. For an outdoor kitchen, a CRI of 90+ is non-negotiable. This framework suggests that the “Best” light is the one that allows the chef to see the subtle change in the color of a searing scallop or the ripeness of a vegetable, regardless of the sun’s position.
Key Categories of Outdoor Lighting Variations
| Category | Typical Fixture | Primary Function | Primary Trade-off |
| Undercap Lighting | LED Linear Strips | Defines boundaries/Ambient | Hard to replace if poorly installed |
| Grill Lights | Flexible Goosenecks | Precision Task Lighting | High heat exposure; lens clouding |
| Bollard / Path | Vertical Posts | Navigation Safety | Can be a trip hazard if misplaced |
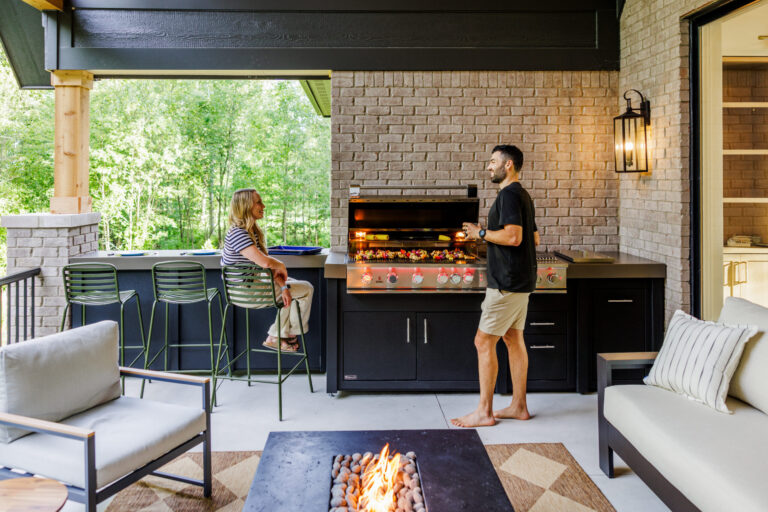
| Sconces | Wall-mounted Units | Perimeter / Architectural | Often creates a “hot spot” on the wall |
| Niche / Recessed | Small puck lights | Highlights texture/Steps | Requires precise masonry cutouts |
| Downlighting | Tree-mounted / Soffit | Mimics Moonlight | Harder to service (requires ladder) |
Realistic Decision Logic
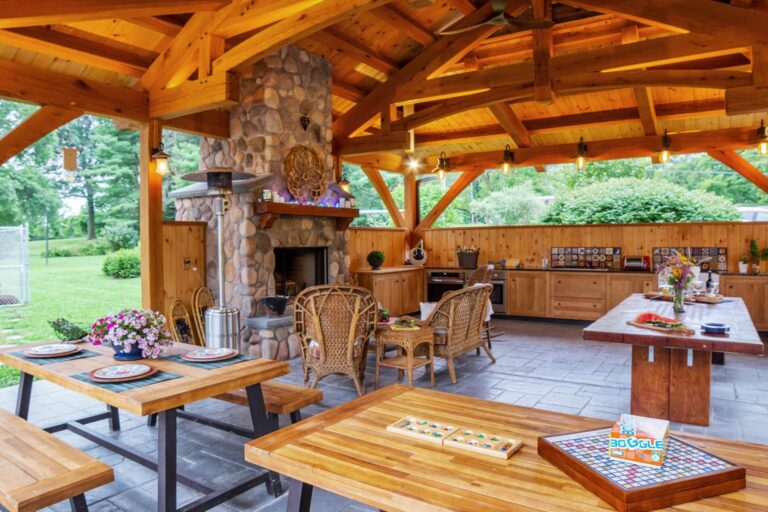
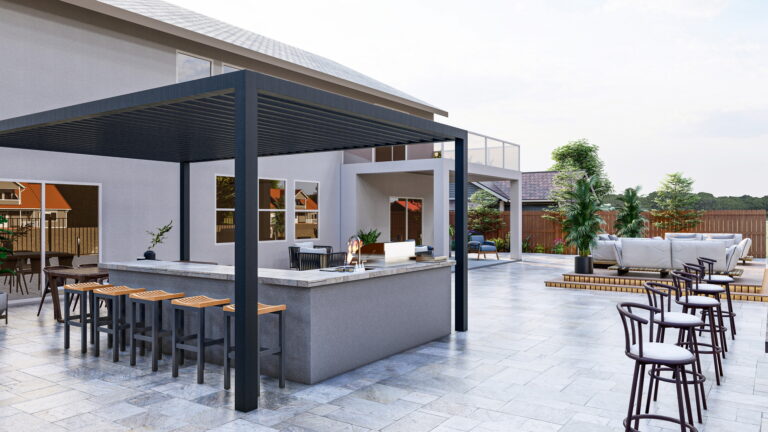
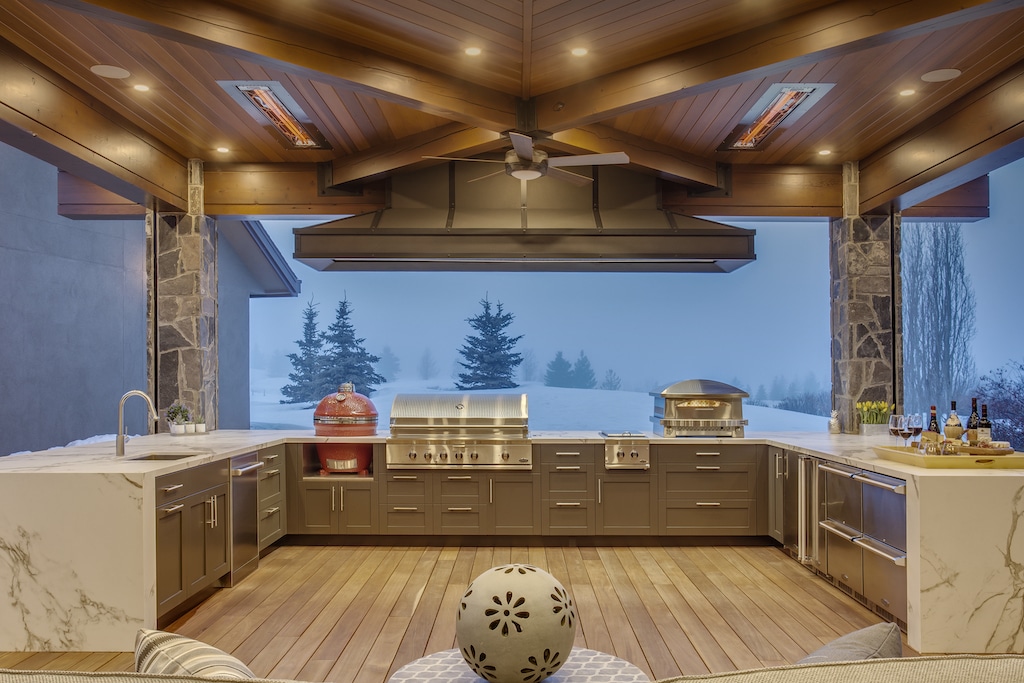
If the kitchen is located under a permanent structure like a pavilion, the logic dictates Recessed Soffit Downlighting. It provides the cleanest look and the best task coverage. However, if the kitchen is “Open Air,” the logic shifts toward Flexible Gooseneck Grill Lights and Hardscape Undercap Lighting. The goal is to anchor the light to the cabinetry since there is no ceiling to house fixtures.
Detailed Real-World Scenarios and Decision Logic Outdoor Kitchen Lighting Guide
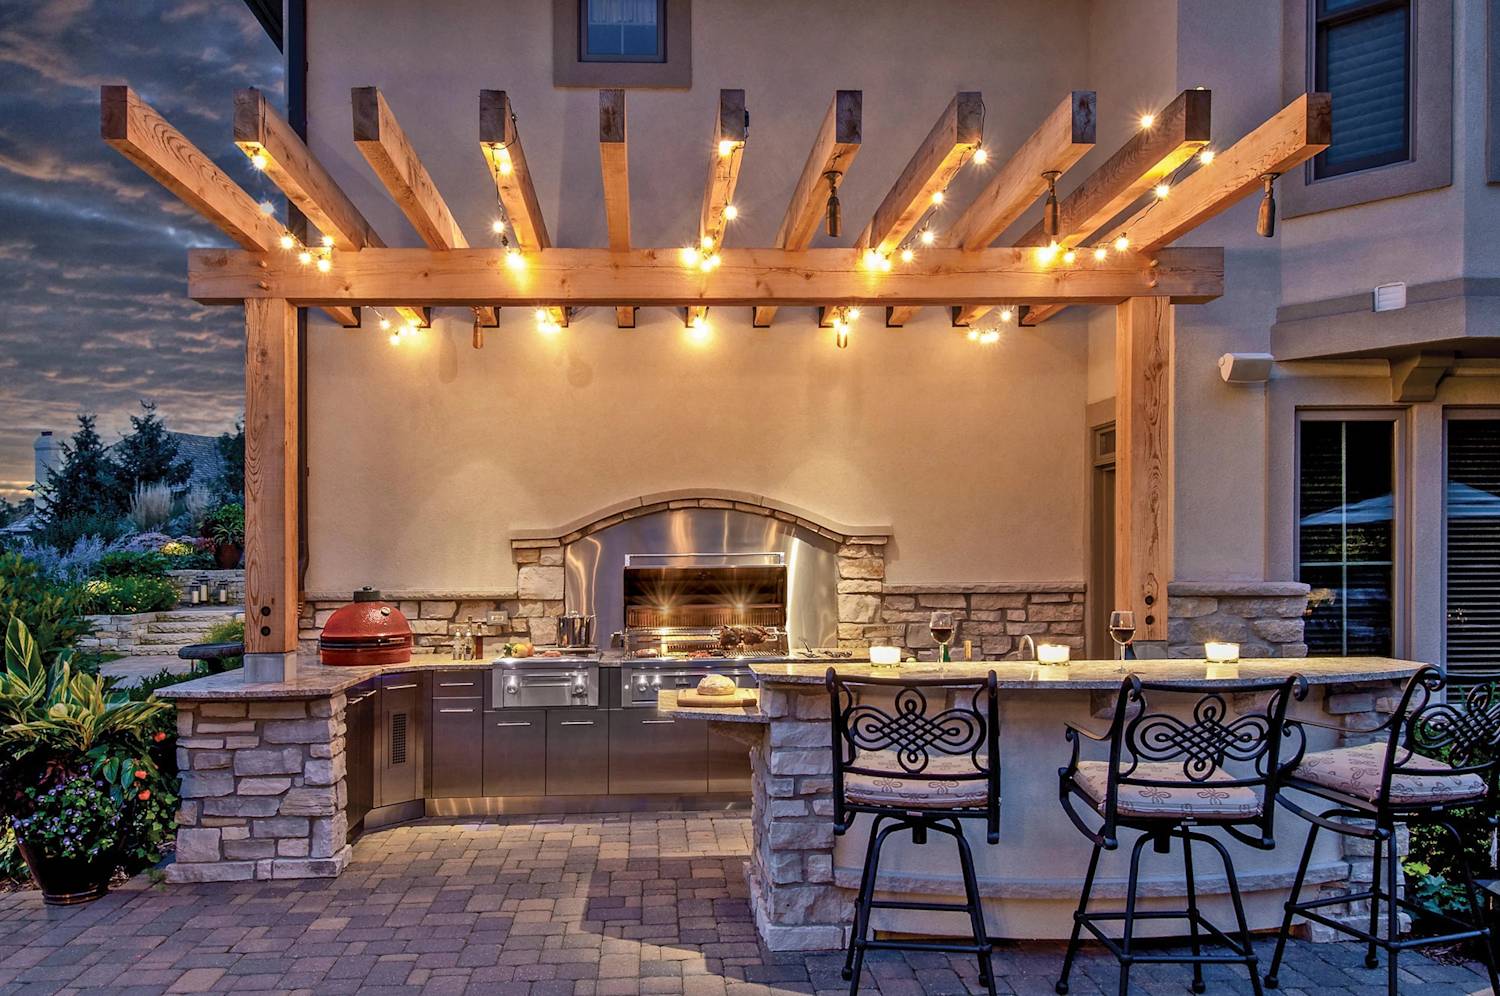
Scenario 1: The “Loggia” Smoke Trap
A high-end kitchen is built under a covered loggia.
-
The Constraint: Smoke from the grill accumulates at the ceiling, obscuring the recessed lights and coating the lenses in grease.
-
The Decision: Move the primary task lighting to a “Rail System” located 2 feet in front of the grill, angled back at a 45-degree angle.
-
Second-Order Effect: This positioning ensures that the smoke rises behind the light beam, keeping the lenses clean and the chef’s view unobstructed.
Scenario 2: The Coastal Salt-Mist Environment
A beachfront property in the Florida Keys.
-
The Stressor: Rapid oxidation of aluminum fixtures.
-
The Solution: Specify “Solid Brass” or “Composite” fixtures with no painted finishes.
-
Failure Mode: Using standard powder-coated aluminum sconces will lead to “pitting” and finish failure within 18 months due to the high salinity.
Scenario 3: The Multi-Level “Safety” Deck
A kitchen located on a raised deck with multiple steps leading to a pool.
-
The Constraint: Guests moving between high-light (kitchen) and low-light (pool) zones.
-
The Decision: Install “Step Lights” with 2200K (very warm) output and low wattage.
-
Result: Provides enough contrast for safety without ruining the guests’ night vision, preventing the “black hole” effect at the edge of the deck.
Planning, Cost, and Resource Dynamics
Lighting is often the “Forgotten 5%” of the budget, but its impact on utility is closer to 50%. Professional systems involve low-voltage (12V or 24V) transformers and burial-grade cabling.
Cost and Variability (2026 Estimates)
| Component | Price Range (Professional) | Lifespan Expectation |
| Transformers (Smart) | $$400 – $\$1,200$ | $15 – 20$ years |
| Solid Brass Fixtures | $$150 – $\$450$ per unit | Lifetime (Metal) |
| LED Engines (High CRI) | $$20 – $\$60$ per bulb | $30,000 – 50,000$ hours |
| Labor (Specialist) | $$1,500 – $\$5,000$ | Per Project |
Opportunity Cost: Choosing “Solar Lights” for an outdoor kitchen is a false economy. Solar units lack the lumen density required for safe food preparation and the consistency needed for architectural beauty. The “Best” options require a hardwired low-voltage backbone that provides stable power regardless of the day’s cloud cover.
Tools, Strategies, and Support Systems
-
Photometric Design Software: Used by architects to create “Heat Maps” of light distribution to ensure there are no dark spots on the prep counters.
-
Voltage Drop Calculators: Essential for long cable runs. If the voltage drops below 10.5V, LED fixtures will flicker or shift in color temperature.
-
Astronomic Timers: Smart controllers that calculate “Sunset” based on GPS coordinates, ensuring the lights turn on exactly when needed without manual adjustment.
-
Magnetic Transformers: More durable than electronic ones, especially in areas with frequent power surges or lightning strikes.
-
Fixture Aiming Shields: Small “Snoots” or “Honeycombs” that clip onto fixtures to narrow the beam and eliminate side-glare.
-
Dimming Drivers: Not all LEDs are dimmable. A system must be specified with “MLV” or “ELV” dimming drivers to allow for atmospheric transition from “Cooking” to “Dining.“
Risk Landscape and Failure Modes
Outdoor electrical systems are prone to “Systemic Contagion”—where a single failure point brings down the entire network.
-
The “Vapor Lock” Failure: Using standard wire nuts instead of silicone-filled “Direct Burial” connectors. Moisture travels up the copper wire (wicking), corroding the fixture from the inside out.
-
The “Heat Sink” Oversimplification: Placing high-wattage LED strips too close to the grill’s firebox. Excess heat kills the LED phosphor, turning the warm light into a sickly blue or purple.
-
The “Over-Lamp” Mode: Using 50-watt equivalent LEDs where a 10-watt unit would suffice. This leads to “Visual Fatigue” and makes the outdoor space feel like a parking lot.
-
Compounding Risk (Ants): In many Southern climates, “Rasberry Crazy Ants” are attracted to the electromagnetic fields of transformers. Without physical barriers or sealed housings, they can short out the entire control system.
Governance, Maintenance, and Long-Term Adaptation
A lighting system is a living asset. Landscapes grow, bulbs shift in color, and lenses accumulate environmental “Grime.“
Layered Maintenance Checklist
-
Quarterly: Wipe down fixture lenses with a vinegar-water solution to remove hard water spots. Check for “Aim Drift”—fixtures that have been bumped by gardeners.
-
Bi-Annually: Prune back foliage that has grown over “Up-lights” or tree-mounted downlights. If the leaves touch the fixture, they can scorch or create a fire hazard.
-
Annually: Inspect the transformer for “Nesting” (spiders/ants). Tighten terminal lugs, as thermal cycling (heat/cold) can loosen wire connections over time.
Adaptation Triggers
If you upgrade your grill to a larger model, the “Task Light” positions may no longer align with the cooking surface. A modular system using “Track” or “Gooseneck” mounts allows for realignment without needing to rewire the entire patio.
Measurement, Tracking, and Evaluation
-
Leading Indicators: Lux levels on the primary prep counter (Aim for 300-500 Lux for task work).
-
Lagging Indicators: Energy consumption on the smart home app; a sudden spike usually indicates a “short” in the burial wire.
-
Qualitative Signal: The “Bug Attraction” Test. If your kitchen is swarmed by moths, your light is likely too blue (high Kelvin). Shifting to 2700K or 2400K (amber) significantly reduces insect disruption.
-
Documentation Example: Maintain a “Fixture Map” that lists the specific beam angle (e.g., 35-degree flood vs. 15-degree spot) for every bulb, making replacements seamless five years later.
Common Misconceptions and Industry Corrections
-
Myth: “LEDs last forever.”
-
Correction: The LED chip may last 50,000 hours, but the “Driver” (the electronics) often fails at 10,000 hours if exposed to high heat.
-
-
Myth: “Blue light is modern and clean.”
-
Correction: High-Kelvin blue light suppresses melatonin and feels “cold.” The most luxurious outdoor kitchens use 2700K—the warmth of a sunset.
-
-
Myth: “I need a light inside the grill.”
-
Correction: Built-in grill lights are notorious for failing due to heat. A high-quality external “Downlight” or “Gooseneck” is more reliable and easier to service.
-
-
Myth: “More lights make a space safer.”
-
Correction: Too many lights create “Contrast Blindness.” Safety comes from uniform, low-glare illumination of trip hazards (steps/edges).
-
Conclusion: The Synthesis of Light and Shadow
The mastery of an outdoor kitchen lighting guide lies in the designer’s ability to respect the darkness. A successful system does not attempt to conquer the night; it curates it. By layering light, prioritizing high Color Rendering, and selecting fixtures that can survive the chemical and thermal brutality of the outdoors, the homeowner creates a space that is as functional as a professional kitchen and as inviting as a campfire.
In 2026, the benchmark for luxury is “Seamless Integration.” The most effective lighting systems are those that are invisible when off and transformative when on. They provide the chef with the surgical clarity needed for culinary excellence while bathing the guests in a warm, unobtrusive glow. As you plan your exterior hub, outdoor kitchen lighting guide, remember that light is the “Final Ingredient”—it is the element that determines whether your outdoor kitchen is a daytime convenience or a nighttime destination.